SQLite を簡単に扱うための DB アダプターの実装
ここでは簡単なメモ入力サンプルプログラムの作成を例にとって、SQLite データベースの利用方法について学びましょう。
着目するところは SQLite を簡単に扱うための DB アダプターの利用です。
SQLite と DB アダプターを利用するサンプルプログラム
それではここで作成するサンプルプログラムの動作を先にみておきましょう。
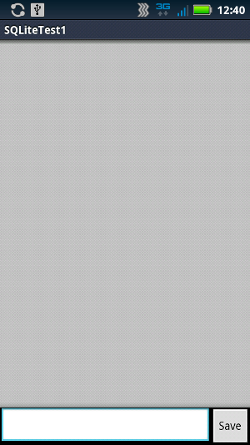
起動直後はこのとおり。画面下部にテキストの入力フィールドと保存ボタンがあるのみです。
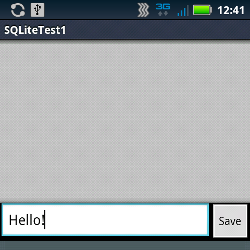
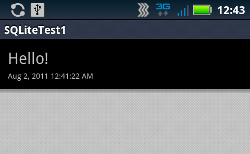
テキストを入力して、"Save" ボタンを押すと・・・
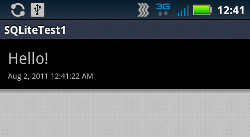
このように入力文字が保存されます。このときに SQLite データベースに入力文字を保存しています。
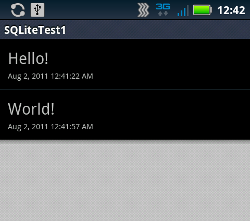
文字を複数入力すると次の画面のようにリストビューにエントリが増えていきます。
エントリを長押しすると、コンテキストメニューが表示されます。今回は削除するかどうかたずねるだけのコンテキストメニューです。

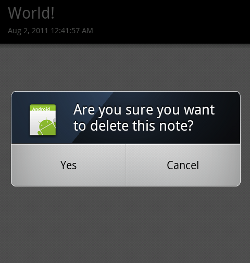
"Delete" (削除) を選択すると、本当に削除するかどうか確認するアラートダイアログを表示。そこで Yes を選択すると実際にデータベースから文字を削除します。
削除後、リストビューをリフレッシュするとエントリがひとつ消えたことがわかります。
さて、これをどのように作ったらよいでしょうか。
データベースの操作以外に UI まわりを片付けてしまいましょう。
レイアウト
main.xml は次の通り。リニアレイアウトで上側 ListView、下側がまたリニアレイアウトで、その中に EditText と Button を横に並べます。
<?xml version="1.0" encoding="utf-8"?>
<LinearLayout
  xmlns:android="http://schemas.android.com/apk/res/android"
  android:orientation="vertical"
  android:layout_width="fill_parent"
  android:layout_height="fill_parent">
  <ListView
    android:layout_height="wrap_content"
    android:id="@+id/itemListView"
    android:layout_width="match_parent"
    android:layout_weight="1"/>
  <LinearLayout
    android:layout_height="wrap_content"
    android:layout_width="match_parent">
    <EditText
      android:layout_height="wrap_content"
      android:layout_weight="1"
      android:id="@+id/memoEditText"
      android:layout_width="wrap_content"
      android:inputType="textMultiLine">
      <requestFocus/>
    </EditText>
    <Button
      android:text="Save"
      android:id="@+id/saveButton"
      android:layout_width="wrap_content"
      android:layout_height="wrap_content"/>
  </LinearLayout>
</LinearLayout>
ListView の行のレイアウトとなる row.xml は次の通り。単に TextView を上下に文字の大小を変えて並べているだけです。
<?xml version="1.0" encoding="utf-8"?>
<LinearLayout
  android:layout_width="fill_parent"
  android:layout_height="fill_parent"
  xmlns:android="http://schemas.android.com/apk/res/android"
  android:orientation="vertical">
  <TextView
    android:text="TextView"
    android:id="@+id/noteTextView"
    android:layout_width="wrap_content"
    android:layout_height="wrap_content"
    android:textSize="20sp"
    android:paddingLeft="10dp"
    android:paddingRight="10dp"
    android:paddingTop="10dp"
    android:paddingBottom="0dp"/>
  <TextView
    android:text="TextView"
    android:id="@+id/lastupdateTextView"
    android:layout_width="wrap_content"
    android:layout_height="wrap_content"
    android:textSize="10sp"
    android:paddingLeft="10dp"
    android:paddingRight="10dp"
    android:paddingTop="2dp"
    android:paddingBottom="10dp"/>
</LinearLayout>
ListView の行のカスタマイズとカスタムアダプターについては、「ListView の行のカスタマイズ」 を参照してください。
例に用いるデータ
便宜上ここでは、データベースに格納するデータを表すクラスを定義しておきます。
package com.keicode.android.test;

public class Note {
  protected int id;
  protected String note;
  protected String lastupdate;

  public Note(int id, String note, String lastupdate){
    this.id = id;
    this.note = note;
    this.lastupdate = lastupdate;
  }

  public String getNote(){
    return note;
  }

  public String getLastupdate(){
    return lastupdate;
  }

  public int getId(){
    return id;
  }

}
メモ内容と更新日時を保持するフィールドだけ定義しています。
DB アダプター
さて、いよいよ今回のキモの部分です。
SQLite データベースを扱うには次のような、android.database.sqlite.SQLiteOpenHelper をラップするデータベースアダプターを定義すると便利です。
package com.keicode.android.test;

import java.util.Date;

import android.content.ContentValues;
import android.content.Context;
import android.database.Cursor;
import android.database.sqlite.SQLiteDatabase;
import android.database.sqlite.SQLiteOpenHelper;

public class DBAdapter {

  static final String DATABASE_NAME = "mynote.db";
  static final int DATABASE_VERSION = 1;

  public static final String TABLE_NAME = "notes";
  public static final String COL_ID = "_id";
  public static final String COL_NOTE = "note";
  public static final String COL_LASTUPDATE = "lastupdate";

  protected final Context context;
  protected DatabaseHelper dbHelper;
  protected SQLiteDatabase db;

  public DBAdapter(Context context){
    this.context = context;
    dbHelper = new DatabaseHelper(this.context);
  }

  //
  // SQLiteOpenHelper
  //

  private static class DatabaseHelper extends SQLiteOpenHelper {

    public DatabaseHelper(Context context) {
      super(context, DATABASE_NAME, null, DATABASE_VERSION);
    }

    @Override
    public void onCreate(SQLiteDatabase db) {
      db.execSQL(
        "CREATE TABLE " + TABLE_NAME + " ("
        + COL_ID + " INTEGER PRIMARY KEY AUTOINCREMENT,"
        + COL_NOTE + " TEXT NOT NULL,"
        + COL_LASTUPDATE + " TEXT NOT NULL);");
    }

    @Override
    public void onUpgrade(
      SQLiteDatabase db,
      int oldVersion,
      int newVersion) {
      db.execSQL("DROP TABLE IF EXISTS " + TABLE_NAME);
      onCreate(db);
    }

  }

  //
  // Adapter Methods
  //

  public DBAdapter open() {
    db = dbHelper.getWritableDatabase();
    return this;
  }


  public void close(){
    dbHelper.close();
  }


  //
  // App Methods
  //


  public boolean deleteAllNotes(){
    return db.delete(TABLE_NAME, null, null) > 0;
  }

  public boolean deleteNote(int id){
    return db.delete(TABLE_NAME, COL_ID + "=" + id, null) > 0;
  }

  public Cursor getAllNotes(){
    return db.query(TABLE_NAME, null, null, null, null, null, null);
  }

  public void saveNote(String note){
    Date dateNow = new Date ();
    ContentValues values = new ContentValues();
    values.put(COL_NOTE, note);
    values.put(COL_LASTUPDATE, dateNow.toLocaleString());
    db.insertOrThrow(TABLE_NAME, null, values);
  }
}
static の変数でデータベース名、バージョン、カラム名を定義しています。
SQLLiteOpenHelper の派生クラスを内部クラスで定義します。 このときコンストラクタでデータベース名、 バージョン番号をスーパークラスのコンストラクタに渡しています。
これによって、バージョンが変わったときに onUpgrade が自動的に呼び出されるようになります。
ここでは onUpgrade では元のテーブルをドロップしているだけですが、 必要に応じて新しいデータベースにデータベースを移行するようにすればよいでしょう。
アダプターのメソッドとアプリケーション固有メソッド
この形の DB アダプターでは open と close をこの例のように定義しておくと便利です。
その他、アプリケーション固有のメソッドをいくつか定義すると良いでしょう。
サンプルプログラムの実装
以上のように DB アダプターを定義しておくと、それの利用側は次のように簡略化されます。
package com.keicode.android.test;

import java.util.ArrayList;
import java.util.List;

import android.app.Activity;
import android.app.AlertDialog;
import android.content.Context;
import android.content.DialogInterface;
import android.database.Cursor;
import android.os.Bundle;
import android.view.ContextMenu;
import android.view.LayoutInflater;
import android.view.MenuItem;
import android.view.View;
import android.view.ViewGroup;
import android.view.ContextMenu.ContextMenuInfo;
import android.view.View.OnClickListener;
import android.view.View.OnCreateContextMenuListener;
import android.view.View.OnLongClickListener;
import android.widget.AdapterView;
import android.widget.BaseAdapter;
import android.widget.Button;
import android.widget.EditText;
import android.widget.ListView;
import android.widget.TextView;
import android.widget.Toast;

public class SQLiteTest1Activity extends Activity
  implements OnClickListener {

  static final String TAG = "SQLiteTest1";
  static final int MENUITEM_ID_DELETE = 1;
  ListView itemListView;
  EditText noteEditText;
  Button  saveButton;
  static DBAdapter dbAdapter;
  static NoteListAdapter listAdapter;
  static List<Note> noteList = new ArrayList<Note>();

    @Override
    public void onCreate(Bundle savedInstanceState) {
        super.onCreate(savedInstanceState);
        setContentView(R.layout.main);
        findViews();
        setListeners();

      dbAdapter = new DBAdapter(this);
      listAdapter = new NoteListAdapter();
      itemListView.setAdapter(listAdapter);

      loadNote();
    }

    protected void findViews(){
      itemListView = (ListView)findViewById(R.id.itemListView);
      noteEditText = (EditText)findViewById(R.id.memoEditText);
      saveButton = (Button)findViewById(R.id.saveButton);
    }

    protected void loadNote(){
      noteList.clear();

      // Read
      dbAdapter.open();
      Cursor c = dbAdapter.getAllNotes();

      startManagingCursor(c);

      if(c.moveToFirst()){
        do {
          Note note = new Note(
            c.getInt(c.getColumnIndex(DBAdapter.COL_ID)),
            c.getString(c.getColumnIndex(DBAdapter.COL_NOTE)),
            c.getString(c.getColumnIndex(DBAdapter.COL_LASTUPDATE))
            );
          noteList.add(note);
        } while(c.moveToNext());
      }

      stopManagingCursor(c);
      dbAdapter.close();

      listAdapter.notifyDataSetChanged();
    }

    protected void saveItem(){
      dbAdapter.open();
      dbAdapter.saveNote(noteEditText.getText().toString());
      dbAdapter.close();
      noteEditText.setText("");
      loadNote();
    }


    protected void setListeners(){
      saveButton.setOnClickListener(this);

      itemListView.setOnCreateContextMenuListener(
        new OnCreateContextMenuListener(){
          @Override
          public void onCreateContextMenu(
            ContextMenu menu,
            View v,
            ContextMenuInfo menuInfo) {
            menu.add(0, MENUITEM_ID_DELETE, 0, "Delete");
          }
        });
    }


  @Override
  public boolean onContextItemSelected(MenuItem item) {

    switch(item.getItemId()){
    case MENUITEM_ID_DELETE:
      AdapterView.AdapterContextMenuInfo menuInfo
        = (AdapterView.AdapterContextMenuInfo)item.getMenuInfo();

        Note note = noteList.get(menuInfo.position);
        final int noteId = note.getId();

      new AlertDialog.Builder(this)
        .setIcon(R.drawable.icon)
        .setTitle("Are you sure you want to delete this note?")
        .setPositiveButton(
          "Yes",
          new DialogInterface.OnClickListener() {
            @Override
            public void onClick(DialogInterface dialog, int which) {
                dbAdapter.open();
                if(dbAdapter.deleteNote(noteId)){
                  Toast.makeText(
                    getBaseContext(),
                    "The note was successfully deleted.",
                    Toast.LENGTH_SHORT);
                  loadNote();
                }
                dbAdapter.close();
            }
          })
        .setNegativeButton(
          "Cancel",
          null)
        .show();

      return true;
    }
    return super.onContextItemSelected(item);
  }


  @Override
  public void onClick(View v) {
    switch(v.getId()){
    case R.id.saveButton:
      saveItem();
      break;
    }
  }


  private class NoteListAdapter extends BaseAdapter {

    @Override
    public int getCount() {
      return noteList.size();
    }

    @Override
    public Object getItem(int position) {
      return noteList.get(position);
    }

    @Override
    public long getItemId(int position) {
      return position;
    }

    @Override
    public View getView(int position, View convertView, ViewGroup parent) {
      TextView noteTextView;
      TextView lastupdateTextView;
      View v = convertView;
      if(v==null){
        LayoutInflater inflater =
          (LayoutInflater)getSystemService(Context.LAYOUT_INFLATER_SERVICE);
        v = inflater.inflate(R.layout.row, null);
      }
      Note note = (Note)getItem(position);
      if(note != null){
        noteTextView = (TextView)v.findViewById(R.id.noteTextView);
        lastupdateTextView = (TextView)v.findViewById(
          R.id.lastupdateTextView);
        noteTextView.setText(note.getNote());
        lastupdateTextView.setText(note.getLastupdate());
        v.setTag(R.id.noteid, note);
      }
      return v;
    }

  }
}
メモの保存、削除箇所ではそれぞれ、 saveItem メソッド、 アダプタの deleteNote メソッドを呼び出しています。