ダイアログの表示
ダイアログは現在のアクティビティの前面に出てきて、ユーザーとの対話を受け付けます。 この資料ではボタンをクリックした時に、ダイアログを表示する方法を示します。
そもそも、ボタンをクリックした時に何かをする、ということについて不明な点がありましたら、
「クリックイベントに応答する」に目を通しておいてください。
Java の普通のお作法に慣れている方なら、簡単に理解できるはずです。
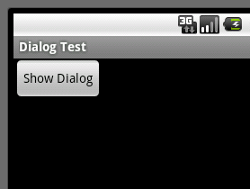
実際に作るものの画面は次の通りです。
まず次のようにボタンがあります。
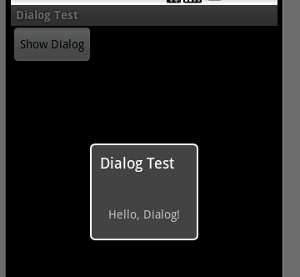
このボタンをクリックすると、次のようにタイトル (ここでは "Dialog Test" という文字がタイトル) と内容 (ここでは "Hello, Dialog!" という文字) が表示されるというものです。
ダイアログを定義
XMLでレイアウトを定義
では、最初に上でみたダイアログのレイアウトを定義しましょう。
<?xml version="1.0" encoding="utf-8"?>
<LinearLayout
	xmlns:android="http://schemas.android.com/apk/res/android"
	android:id="@+id/linearLayout1"
	android:layout_width="fill_parent"
	android:layout_height="fill_parent"
	android:padding="20dip">
	<TextView
		android:id="@+id/textView1"
		android:layout_width="wrap_content"
		android:layout_height="wrap_content"
		android:text="@string/test_message"/>
</LinearLayout>
ここでは単純にタイトルをテキストメッセージを表示するだけなので、LinearLayout に TextView を含む形で単純に定義しています。
さらに文字列のリソースは res/values/strings.xml に次のように定義します。
<?xml version="1.0" encoding="utf-8"?>
<resources>
    <string name="test_message">Hello, Dialog!</string>
    <string name="test_title">Dialog Test</string>
    <string name="app_name">Dialog Test</string>
</resources>
コードで Dialog クラスを定義
Dialog クラスは次の通りです。
package com.keicode.android.test;

import android.app.Dialog;
import android.content.Context;
import android.os.Bundle;

public class HelloDialog extends Dialog {

	public HelloDialog(Context context) {
		super(context);
	}

	protected void onCreate(Bundle savedInstanceState){
		super.onCreate(savedInstanceState);
		setTitle(R.string.test_title);
		setContentView(R.layout.hellodialog);
	}

}
様々に派生するダイアログのベースクラスである android.app.Dialog から直接ダイアログを作成しています。
アクティビティと同様に onCreate で setContentView を使って XML からビューを作成しています。
親となるアクティビティ
ダイアログの親となるアクティビティについては、「クリックイベントに応答する」でみたものとまったく同様です。 前回はクリックイベントに応答して、Log.d メソッドでデバッグログを記録しただけでしたが、 そこを書き換えてダイアログを表示します。
package com.keicode.android.test;

import android.app.Activity;
import android.app.Dialog;
import android.os.Bundle;
import android.view.View;
import android.view.View.OnClickListener;

public class ATest1 extends Activity implements OnClickListener {

    public void onCreate(Bundle savedInstanceState) {
        super.onCreate(savedInstanceState);
        setContentView(R.layout.main);

        View showButton = findViewById(R.id.button1);
        showButton.setOnClickListener(this);
    }

    @Override
    public void onClick(View v) {
        switch(v.getId()){
        case R.id.button1:
            Dialog dlg = new HelloDialog(this);
            dlg.show();
        }
    }
}
View のレイアウト定義は次の通りです。
<?xml version="1.0" encoding="utf-8"?>
<LinearLayout xmlns:android="http://schemas.android.com/apk/res/android"
    android:orientation="vertical"
    android:layout_width="fill_parent"
    android:layout_height="fill_parent"
    >
	<Button
		android:id="@+id/button1"
		android:layout_width="wrap_content"
		android:layout_height="wrap_content"
		android:text="Show Dialog"></Button>
</LinearLayout>
ダイアログの表示部分に戻りましょう。(コードが短いので、うっかり素通りしそうですね)
ダイアログを表示しているのは次の部分です。 Dialog のインスタンスを作成して、それの show メソッドを呼んでいます。
            Dialog dlg = new HelloDialog(this);
            dlg.show();