ListFragment の基本的な使い方
リスト表示するウィジェットとしては、ListView があります。
これを簡便に使うために API レベル 1 のころから、ListActivity なるアクティビティが用意されていました。
フラグメントでは、ListFragment があります。
この記事では ListFragment の基本的な使用方法を説明します。
ListFragment の基本的な使用方法
ListFragment は ListView オブジェクトをホストしており、さまざまなデータソースとバインドすることが可能です。
デフォルトのスクリーンレイアウトはシングルリストビューです。カスタマイズも可能ですが、それについてはまた別の機会に説明します。
前述の通り、ListFragment は ListView を利用します。リストビューについては、当サイトの「リストビュー」 を参考にしてください。
さて、ここで作るのはいたって簡単なものです。
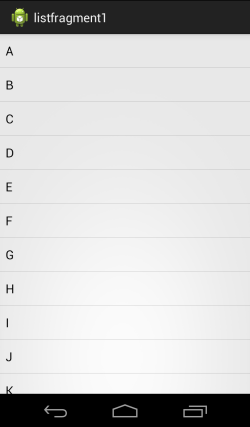
・・・ま、どうやっても出来そうな簡単なものですね(笑)
ところが、フラグメントにしておくとやはり良いことがあって、横向きにしたときに同じコードを使ってこんな風に二列にすることも簡単です。

コードとレイアウトをまとめる単位がアクティビティのレベルではこうはいかないですよね。
さて、このコードは次の通りです。ListView がわかっていれば簡単です。
まず MainActivity.java は次の通り。
package com.example.listfragment1;

import android.os.Bundle;
import android.app.Activity;

public class MainActivity extends Activity {

  @Override
  protected void onCreate(Bundle savedInstanceState) {
    super.onCreate(savedInstanceState);
    setContentView(R.layout.activity_main);
  }

}
ここで参照しているレイアウト (activity_main) は次の通り。まず layout/activity_main.xml。
<LinearLayout
  xmlns:android="http://schemas.android.com/apk/res/android"
  xmlns:tools="http://schemas.android.com/tools"
  android:layout_width="match_parent"
  android:layout_height="match_parent"
  android:orientation="horizontal">
  <fragment
    android:id="@+id/booklistFragment1"
    class="com.example.listfragment1.fragment.MyListFragment"
    android:layout_width="match_parent"
    android:layout_height="match_parent"/>
</LinearLayout>
ランドスケープ用のレイアウト layout-land/activity_main.xml は次の通り。
<LinearLayout
  xmlns:android="http://schemas.android.com/apk/res/android"
  xmlns:tools="http://schemas.android.com/tools"
  android:layout_width="match_parent"
  android:layout_height="match_parent"
  android:orientation="horizontal">
  <fragment
    android:id="@+id/booklistFragment1"
    class="com.example.listfragment1.fragment.MyListFragment"
    android:layout_weight="1"
    android:layout_width="0dp"
    android:layout_height="match_parent"/>
  <View
    android:layout_width="5dp"
    android:layout_height="match_parent"
    android:background="#008800"/>
  <fragment
    android:id="@+id/booklistFragment2"
    class="com.example.listfragment1.fragment.MyListFragment"
    android:layout_weight="1"
    android:layout_width="0dp"
    android:layout_height="match_parent"/>

</LinearLayout>
ちなみにフラグメントとは無関係ですが、二つのフラグメントの区切り線として View を使っています。 ただ線を引くだけなら、こんな風に View を利用することも便利なので、試したことの無い方はぜひお試しください。
MyListFragment.java は次の通り。
package com.example.listfragment1.fragment;

import com.example.listfragment1.model.MyList;

import android.os.Bundle;
import android.app.ListFragment;
import android.widget.ArrayAdapter;

public class MyListFragment extends ListFragment {

  @Override
  public void onActivityCreated(Bundle savedInstanceState) {
    super.onActivityCreated(savedInstanceState);

    ArrayAdapter<String> adapter =
      new ArrayAdapter<String>(
        getActivity(),
        android.R.layout.simple_list_item_1,
        MyList.Data);

   setListAdapter(adapter);
  }

}
ArrayAdapter を作成してから、ListFragment の setListAdapter メソッドでそのアダプターを ListFragment がホストする ListView に渡しています。
ここで利用しているデータは次の通り。
package com.example.listfragment1.model;

public class MyList {

  public static final String[] Data = {
    "A", "B", "C", "D", "E", "F", "G", "H", "I", "J",
    "K", "L", "M", "N", "O", "P", "Q", "R", "S", "T",
    "U", "V", "W", "X", "Y", "Z"
  };

}
単純なスタティックなデータを作っているだけです。