アプリケーションからカメラを起動して静止画を取得する方法
ここではもっとも基本的な静止画像の取得方法として、アプリケーションからカメラを起動して画像を取得する方法を示します。
実際に動かしてみることで、いくつかの問題点も見えてきます。
外部のカメラアプリケーションを起動して撮影
ここで作成するプログラムは次のような動きをします。
画面上部に ImageView を、下部に Button を配置。
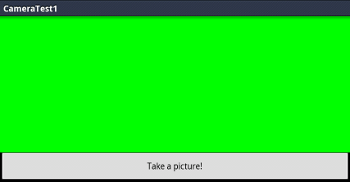
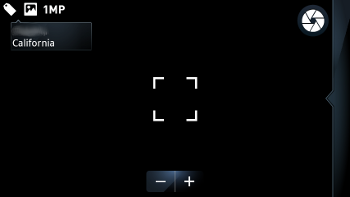
"Take a picture!" ボタンを押すとカメラが起動。
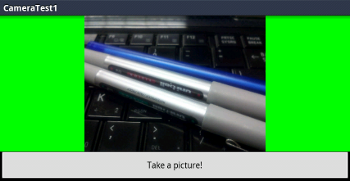
写真撮影後 "Done" を押して元のアプリケーションに戻ると、ImageView に撮影した画像が設定される。
カメラアプリケーションへインテントを送る
カメラアプリケーションへインテントを送る、標準的なアクションインテントは MediaStore.ACTION_IMAGE_CAPTURE です。
特に Extra に EXTRA_OUTPUT を設定しない場合は、この結果として小さいサイズの画像の Bitmap オブジェクトが返ります。
ではさっそく、実装しましょう。
レイアウトリソース
<?xml version="1.0" encoding="utf-8"?>
<LinearLayout
	xmlns:android="http://schemas.android.com/apk/res/android"
	android:layout_width="fill_parent"
	android:layout_height="fill_parent"
	android:orientation="vertical" >
	<ImageView
		android:id="@+id/imageView1"
		android:layout_width="fill_parent"
		android:layout_height="wrap_content"
		android:layout_weight="1"
		android:background="#00ff00"/>
	<Button
	    android:id="@+id/button1"
	    android:layout_width="fill_parent"
	    android:layout_height="wrap_content"
	    android:text="Take a picture!"/>
</LinearLayout>
コード
package com.keicode.android.test;

import android.app.Activity;
import android.content.Intent;
import android.graphics.Bitmap;
import android.os.Bundle;
import android.provider.MediaStore;
import android.view.View;
import android.view.View.OnClickListener;
import android.widget.Button;
import android.widget.ImageView;

public class CameraTest1Activity extends Activity {

	static final int REQUEST_CAPTURE_IMAGE = 100;

	Button button1;
	ImageView imageView1;

	@Override
	public void onCreate(Bundle savedInstanceState) {
		super.onCreate(savedInstanceState);
		setContentView(R.layout.main);
		findViews();
		setListeners();
	}

	protected void findViews(){
		button1 = (Button)findViewById(R.id.button1);
		imageView1 = (ImageView)findViewById(R.id.imageView1);
	}

	protected void setListeners(){
		button1.setOnClickListener(new OnClickListener(){
			@Override
			public void onClick(View v) {
				Intent intent = new Intent(
					MediaStore.ACTION_IMAGE_CAPTURE);
				startActivityForResult(
					intent,
					REQUEST_CAPTURE_IMAGE);
			}
		});
	}

	@Override
	protected void onActivityResult(
		int requestCode,
		int resultCode,
		Intent data) {
		if(REQUEST_CAPTURE_IMAGE == requestCode
			&& resultCode == Activity.RESULT_OK ){
			Bitmap capturedImage =
				(Bitmap) data.getExtras().get("data");
			imageView1.setImageBitmap(capturedImage);
		}
	}

}
ポイントは MediaStore.ACTION_IMAGE_CAPTURE インテントを送っているところと、onActivityResult メソッドでカメラからの結果を取得している箇所です。
getExtras().get("data") で直接 Bitmap オブジェクトが取得できるので簡単ですね。